Every Expensieve account has its own inbound email address. You'll find it on the Settings page, under Email Forwarding Address. Forward a bank alert or an e-receipt to it and Expensieve reads the merchant, amount, and date, then files the transaction for you.
You can start forwarding straight away — just hit forward in your mail app. Nothing below is required.
If you use Gmail, though, you can have it forward those emails on its own, so you never have to think about it again. There are two parts: first register your Expensieve address with Gmail, then create a filter that forwards matching mail to it.
u-…@in.expensieve.app. You'll need it in step 3.
Part 1 · Steps 1–6Register your Expensieve address
-
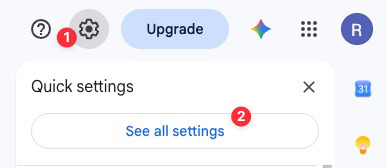
Open Gmail on desktop and click the gear icon in the top-right corner, then click See all settings.
-
Go to the Forwarding and POP/IMAP tab and click Add a forwarding address.

-
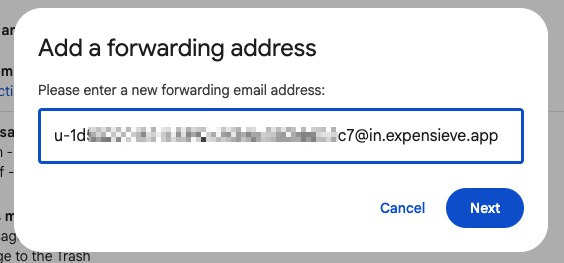
Paste your Expensieve inbound address into the popup, then click Next.
-
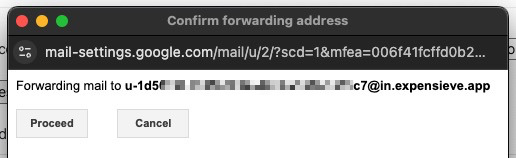
Gmail may ask you to sign in again. A confirmation window then opens — click Proceed.
-
Gmail now emails a confirmation request to your Expensieve address. Go back to your Expensieve Settings page — a notice appears at the top. Click Confirm Forwarding to open Gmail's verification page.
If the notice isn't there yet, wait a few seconds and refresh the page.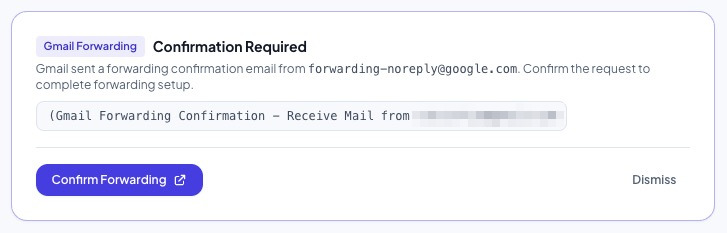
-
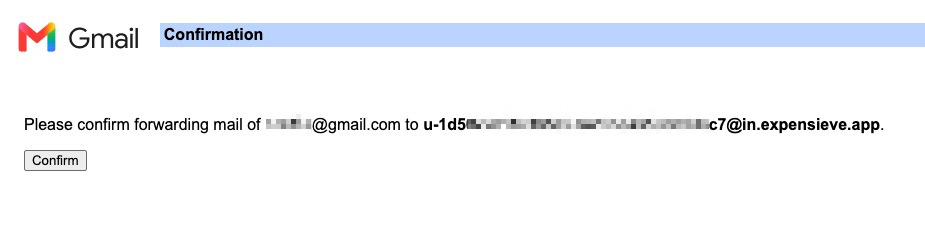
Gmail may ask you to authenticate once more, then shows the final confirmation. Click Confirm — your Expensieve address is now registered with Gmail.
Part 2 · Steps 7–9Create a filter for your bank's emails
Registering the address lets you forward to it; a filter decides which emails get forwarded. Rather than sending your whole inbox, point the filter at just the alerts your bank sends.
-
In Gmail, click the Show search options icon at the right-hand end of the search bar.

-
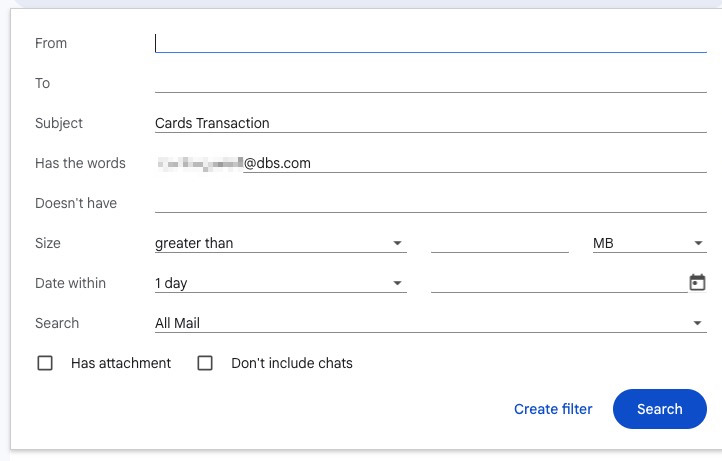
Describe the emails you want forwarded. Usually your bank's sender address in From is enough; you can narrow it further with a recurring phrase from the alert in Subject. Then click Create filter.
-
Tick Forward it to and pick your Expensieve address from the dropdown, then click Create filter.
If the address isn't in the list, refresh the page and open the filter options again.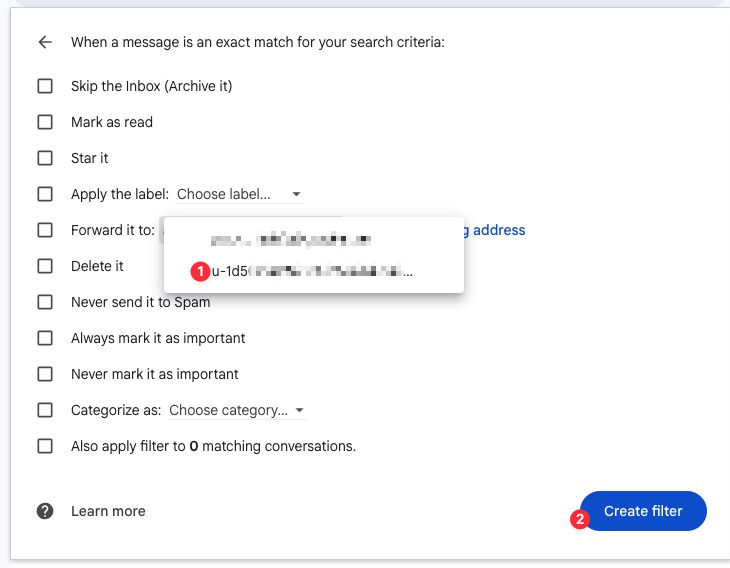
That's it
From here on, every matching email your bank sends is forwarded to Expensieve automatically, extracted, categorized, and added to your transactions — usually within a few seconds of arriving.
If transactions stop appearing, check that the address on your Settings page still matches the one in your Gmail filter. Regenerating your inbound address invalidates the old one, so the filter has to be updated to match.